Sarah noticed her tabby cat, Whiskers, scratching his ears constantly for three days. The dark, coffee-ground-like discharge and strong smell confirmed her fears. After visiting the vet, she learned about cat ear mite treatment options that would help Whiskers feel better quickly.
Many cat owners face this same problem. Your cat shakes their head, scratches their ears raw, and develops thick, dark discharge. The constant scratching keeps everyone awake at night. However, ear mites don’t have to cause lasting problems when you know the right treatment approach is used.
Why Effective Cat Ear Mite Treatment Matters
Cat ear mite treatment becomes necessary because these tiny parasites cause serious discomfort. Otodectes cynotis mites live in your cat’s ear canals, feeding on skin cells and earwax. Without proper treatment, they multiply rapidly and create bigger health problems.
The benefits of prompt treatment include:
- Quick relief from constant itching and head shaking
- Prevention of secondary bacterial infections
- Protection against permanent hearing damage
- Peace of mind knowing your cat feels comfortable again
- Cost savings from avoiding complications
Untreated ear mites can lead to ruptured eardrums, severe inflammation, and hearing loss. Additionally, the mites spread easily between pets in your household. Therefore, addressing the problem quickly protects all your animals.
What You Need Before Starting Treatment
Before beginning any cat ear mite treatment, gather these essential items:
Required supplies:
- Cotton balls or soft cloths
- Ear cleaning solution (vet-approved)
- Prescribed medication from your veterinarian
- Clean towels for restraining your cat
- Good lighting or a flashlight
Important preparation steps:
- Schedule a vet appointment for a proper diagnosis
- Prepare a quiet, comfortable treatment area
- Have a helper available if your cat resists handling
- Remove any jewelry that might scratch your pet
Treatment Resources and Tools
| Item | Purpose | Recommended Specifications | Where to Find |
| Ear cleaning solution | Remove debris and excess wax | Gentle, pH-balanced formula | Veterinary clinic or pet store |
| Cotton balls | Apply the cleaning solution safely | Soft, lint-free material | Any pharmacy or grocery store |
| Prescribed medication | Kill ear mites effectively | Vet-prescribed drops or systemic treatment | Veterinary clinic |
| Towel | Safely restrain your cat | Large, soft towel | Home supply |
| Flashlight | See the inside of the ear canal clearly | Bright LED light | Hardware store |
Step-by-Step Cat Ear Mite Treatment Process
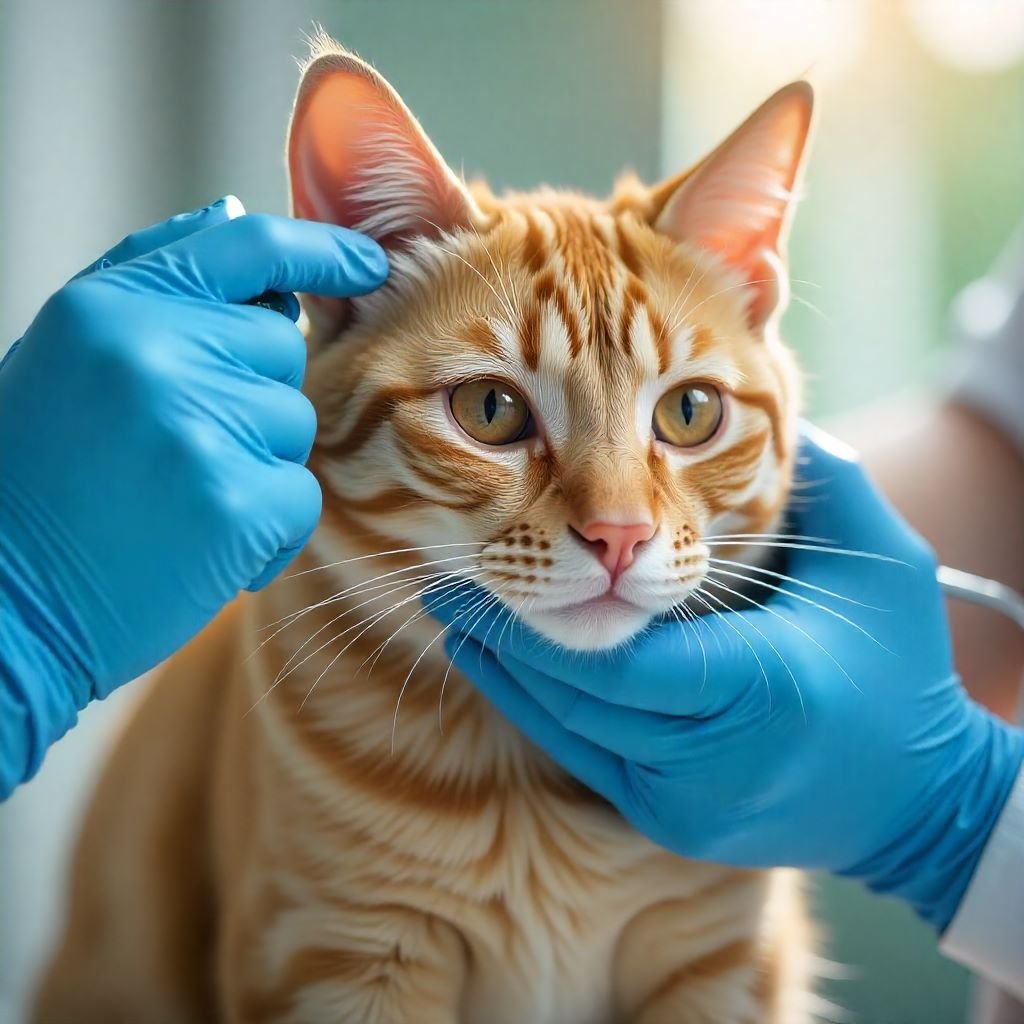
Step 1 – Veterinary Diagnosis for Accurate Cat Ear Mite Treatment
First, could you schedule an appointment with your veterinarian? Many ear problems look similar, but only a professional can confirm ear mites through microscopic examination.
What to expect during the visit:
- Physical examination of your cat’s ears
- Microscopic analysis of ear discharge
- Discussion of treatment options
- Instructions for home care
The veterinarian will use an otoscope to look inside your cat’s ears. Then, they’ll collect a sample of the discharge using a cotton swab. Under the microscope, ear mites appear as tiny, moving specks with their eggs.
Step 2 – Prescribed Medication for Effective Cat Ear Mite Treatment
Your vet will prescribe specific medication based on your cat’s condition. Common treatments include topical drops applied directly to the ears or systemic medications applied to the skin.
Application process for ear drops:
- Clean your cat’s ears gently with an approved solution
- Hold your cat securely but calmly
- Lift the ear flap and apply drops as directed
- Massage the base of the ear for 30 seconds
- Allow your cat to shake their head
- Wipe away excess discharge with a cotton ball
For systemic treatments:
- Part the fur between your cat’s shoulder blades
- Apply the medication directly to the skin
- Make sure your cat cannot lick the area
- Wash your hands thoroughly after application
Step 3 – Daily Ear Cleaning During Ear Mite Treatment for Cats
Clean your cat’s ears daily during treatment to remove debris and dead mites. Use only vet-approved cleaning solutions, never water or home remedies.
Proper cleaning technique:
- Warm the cleaning solution to room temperature
- Apply the solution to a cotton ball, not directly in the ear
- Gently wipe visible areas of the ear canal
- Never push cotton swabs deep into the ear
- Use fresh cotton balls for each ear
- Clean until cotton balls come away mostly clean
Step 4 – Monitoring Progress After Cat Ear Mite Treatment
Watch for improvement in your cat’s symptoms. Most cats feel better within the first week, but complete treatment takes about three weeks.
Signs of improvement:
- Less head shaking and scratching
- Reduced ear discharge
- Decreased odor from the ears
- Your cat seems more comfortable
- Discharge changes from dark to light brown
Warning signs requiring vet contact:
- Worsening symptoms after one week
- Signs of pain when touching the ears
- Balance problems or head tilting
- Discharge becomes yellow or green (suggests bacterial infection)
Step 5 – Follow-Up and Prevention After Cat Ear Mite Treatment
Schedule a follow-up appointment to confirm the mites are eliminated. Your veterinarian will examine your cat’s ears and may take another sample for microscopic analysis.
Post-treatment care:
- Continue medication for the full prescribed period
- Keep your cat’s ears clean and dry
- Monitor for any return of symptoms
- Treat all pets in your household simultaneously
Professional Tips for Successful Cat Ear Mite Treatment
Tip 1: Treat All Pets Together. Ear mites spread easily between cats and dogs. Even if only one pet shows symptoms, treat all animals in your household. This prevents reinfection and breaks the cycle completely.
Tip 2: Complete the Full Treatment Course. Even when your cat feels better after a few days, continue treatment for the full prescribed period. Stopping early allows surviving mites to multiply again, creating a stronger infestation.
Tip 3: Use the Right Restraint Technique. Wrap your cat gently in a towel, leaving only the head exposed. This “burrito” method keeps your cat calm and prevents scratching during treatment. Speak softly and work quickly but carefully.
Tip 4: Time Treatments Strategically apply treatments when your cat is naturally calmer, such as after meals or play sessions. Avoid treating when your cat is already stressed or excited.
Tip 5: Clean the Environment. Wash your cat’s bedding, toys, and favorite resting spots with hot water. Although ear mites don’t survive long off the host, cleaning removes any lingering parasites.
Tip 6: Watch for Secondary Infections. The scratching from ear mites can create open wounds that become infected with bacteria. If you notice yellow or green discharge, contact your veterinarian immediately for antibiotic treatment.
Common Cat Ear Mite Treatment Mistakes and How to Avoid Them
| Common Mistake | Why It Happens | How to Avoid It |
| Stopping treatment early | The cat seems better after a few days | Continue the full prescribed course even when symptoms improve |
| Using home remedies only | Wanting to avoid vet costs | Always get a professional diagnosis before treating |
| Treating only symptomatic pets | Not realizing that mites spread easily | Treat all cats and dogs in the household simultaneously |
| Pushing cotton swabs deep | Trying to clean thoroughly | Only clean visible areas, never push into the ear canal |
| Skipping follow-up visits | Assuming treatment worked | Schedule a recheck to confirm mites are eliminated |
Alternative Treatment Approaches
Prescription Systemic Medications
Modern treatments include spot-on applications that work from inside your cat’s body. These medications, such as selamectin (Revolution) or moxidectin, kill ear mites with a single application.
Benefits:
- No daily ear handling required
- Treats mites throughout the body
- Also prevents fleas, ticks, and worms
- Less stressful for anxious cats
Best for: Cats who resist ear handling or households with multiple pets.
Combination Therapy
Some cases require both topical and systemic treatments, especially when secondary bacterial infections develop.
Components:
- Antiparasitic medication for mites
- Antibiotic drops for bacterial infection
- Anti-inflammatory medication for severe swelling
- Regular ear cleaning to remove debris
Best for: Severe infestations with complications.
Injectable Treatments
Veterinarians sometimes use injectable ivermectin for difficult cases, though this is less common due to potential side effects.
Considerations:
- Requires multiple veterinary visits
- More expensive than topical treatments
- Reserved for severe or resistant cases
- Not suitable for all cat breeds
Prevention Strategies to Avoid Future Cat Ear Mite Treatment
Monthly Preventives That Work as Cat Ear Mite Treatment
Many flea and tick preventatives also protect against ear mites. Products containing selamectin, moxidectin, or similar ingredients prevent infestations before they start.
Popular options:
- Revolution (selamectin)
- Advantage Multi (moxidectin)
- Bravecto (fluralaner)
Regular Ear Cleaning to Prevent the Need for Ear Mite Treatment
Clean your cat’s ears weekly with a gentle, vet-approved solution. This removes wax buildup that attracts mites and allows early detection of problems.
Weekly cleaning routine:
- Use the ear cleaning solution on a cotton ball
- Gently wipe visible areas of the ear canal
- Check for unusual discharge or odor
- Monitor for excessive scratching
- Contact the vet if anything seems abnormal
Environmental Care to Reduce the Risk of Cat Ear Mite Treatment
Keep indoor cats away from stray or feral animals that might carry mites. If your cat goes outside, consider limiting contact with unknown animals.
Smart practices:
- Quarantine new pets before introducing them to the household
- Regular veterinary checkups for all pets
- Clean and disinfect pet areas regularly
- Monitor pets for early signs of ear problems
When to Seek Emergency Care
Most ear mite cases respond well to standard treatment. However, certain symptoms require immediate veterinary attention:
- Balance problems or stumbling when walking
- Severe head tilting that doesn’t improve
- Yellow or green discharge, suggesting bacterial infection
- Open wounds around the ears from excessive scratching
- Signs of pain when the ears are touched lightly
- Hearing loss or lack of response to sounds
These symptoms suggest complications that need professional treatment beyond basic ear mite medication.
Success Stories and Recovery Timeline
Most cats show improvement within one week of starting treatment. The typical recovery timeline looks like this:
Days 1-3: Initial treatment begins; some continued scratching is normal. 4-7: Noticeable decrease in head shaking and scratching. Days 8-14: Discharge becomes lighter in color and reduces significantly
Days 15-21: Symptoms nearly gone, ears look much healthier. Days 22-28: Follow-up visit confirms successful treatment
Remember that every cat responds differently. Some feel better in just a few days, while others take the full three weeks to recover completely. Consistency with treatment makes the biggest difference in recovery speed.
Moving Forward with Confidence
Cat ear mite treatment doesn’t have to be overwhelming when you follow the right steps. Start with a professional diagnosis, use prescribed medications exactly as directed, and complete the full treatment course. Most cats recover completely within three weeks and return to their normal, comfortable lives.
The key to success lies in early detection and consistent treatment. Watch for signs like excessive scratching, head shaking, and dark discharge. When you notice these symptoms, contact your veterinarian promptly for proper diagnosis and treatment recommendations.
Prevention remains your best strategy for avoiding future problems. Use monthly preventive medications, maintain regular ear cleaning routines, and schedule routine veterinary checkups. These simple steps keep your cat healthy and comfortable year-round.
Frequently Asked Questions
What medication kills ear mites most effectively?
Prescription medications like selamectin (Revolution) and moxidectin (Advantage Multi) kill ear mites with a single application. Topical ivermectin and milbemycin drops also work well when used as directed by your veterinarian.
Can you treat ear mites without visiting a vet?
Professional diagnosis is strongly recommended because many ear conditions look similar to ear mites. Over-the-counter treatments may not work and could delay proper care, allowing the infestation to worsen.
What natural remedies help with ear mites?
While mineral oil can reduce mite populations, it requires many repeated applications and may not eliminate the infestation completely. Prescription treatments are much more effective and faster-acting than home remedies.
How do you treat ear mites in young kittens?
Kittens need special consideration due to their size and developing immune systems. Your veterinarian will prescribe age-appropriate medications and may recommend gentler cleaning solutions designed for young cats.
How can you permanently eliminate ear mites?
Complete elimination requires treating all pets in the household simultaneously and finishing the full prescribed treatment course. Follow-up veterinary visits confirm successful treatment and prevent reinfection.
How long does ear mite treatment typically take?
Most cats feel better within one week, but complete treatment takes about three weeks. The mite life cycle requires this timeline to ensure all eggs hatch and are eliminated by the medication.
What type of oil works best for ear mites?
Mineral oil can help reduce mite populations temporarily, but prescription medications work much more effectively. Never use essential oils or cooking oils, as these can irritate your cat’s sensitive ear tissue and cause additional problems.